Countertop Installation Temecula, CA
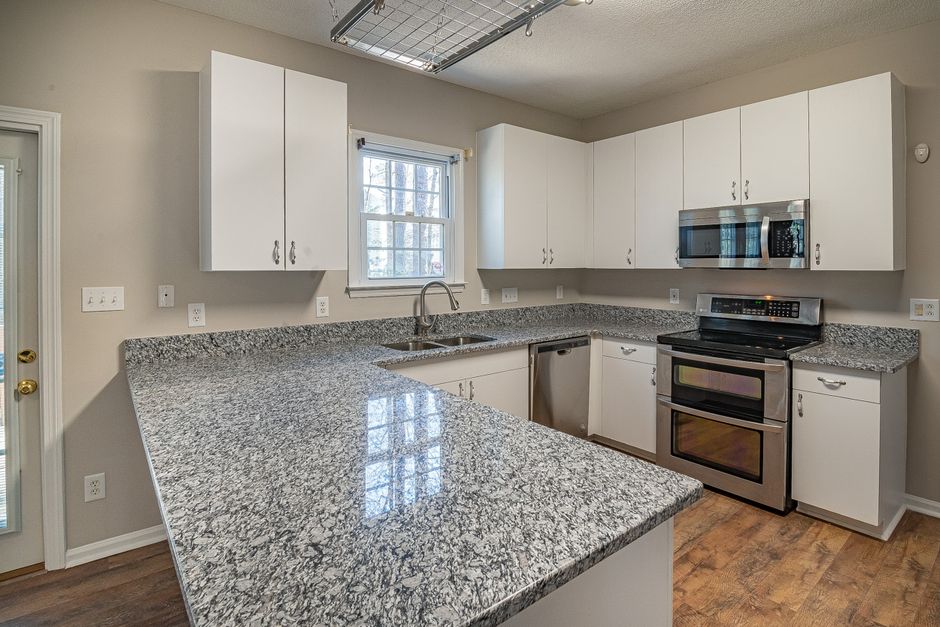
Install day notes for countertop installation in Temecula, CA: templating, slab setting, seams, overhang supports and cutouts in local tract and ranch houses.
What We Cover
- How Slabs Get Carried Into a Temecula House The path a heavy slab takes from the truck to the cabinets in a Temecula tract or ranch home, and what clears the way.
- Installing Countertops in Temecula Summer Heat What triple-digit Inland Empire heat and dust do to adhesive, crews and an open garage on countertop install day.
- Overhang Supports for Islands and Breakfast Bars How far a slab can hang past the cabinet, and when a corbel or steel bracket is needed on a Temecula island or bar top.
- Sink and Cooktop Cutouts and the Final Hookup Day How sink and cooktop cutouts are made from the template, what waits for the plumber, and the backsplash gap left at the wall.
- What Happens at the Countertop Template Visit How a template visit works in a Temecula home, what gets measured and what the fabricator needs ready before the tech arrives.
- Where Countertop Seams Land on an L-Shaped Kitchen How installers choose seam locations on L-shaped and island kitchens common in Temecula homes, and how seams get joined.
Countertop Installation Temecula, CA
Countertop installation in Temecula, CA is mostly a sequence, and the order matters more than any single step. The crew templates the cabinets, the shop cuts the stone, and install day sets each slab on cabinets that have to be level, fastened and ready. Tract houses and ranch houses around the Temecula Valley each bring their own habits: bowed drywall at the corners, long L-shaped runs and islands built for seating.
Templating comes first
Nothing is cut from a drawing. A tech visits the finished cabinets, records every wall, and builds a template with wood strips or a digital unit. The sink and cooktop models have to be on site by then, because the cutouts come from the real appliances. The slab layout, the seam locations and the overhang depth are all settled from that one visit.
Install day in the valley
The truck arrives early, partly because the Inland Empire heat shortens the working time of seam adhesive by early afternoon. Slabs travel on edge on A-frame carts, through the door the crew measured days before. Wind off the Santa Margarita River bed and dust from the wine country side of town get kept off the seams by shutting the garage and wiping each edge before bonding.
Seams, overhangs and cutouts
A seam goes at the inside corner of an L, away from the sink cutout and the cooktop cutout, and it is joined with color-matched adhesive and checked for level. An island overhang for seating needs a corbel or a hidden bracket, fastened to the cabinet frame, because unsupported stone cracks at the narrow strip beside a cutout. Plumbing and gas hookups wait until the stone is bonded.
Guides
The pages here walk through the template visit, getting slabs into a house, seam placement on L-shaped kitchens, overhang supports, summer heat and dust, and the cutouts that finish the day. The posts cover related questions from Temecula homeowners.
Latest Guides

Getting a Temecula Kitchen Ready for Countertop Install Day
How should the kitchen look when the install crew arrives?
Empty, level and reachable. The cabinets should be bare of the old top, the floor clear along the path from the door, and the room free of anything that could be knocked over by a slab swinging around a corner. A crew that arrives to a cluttered kitchen spends the first hour moving a family's belongings instead of setting stone, and that hour comes out of the part of the day when the adhesive still has working time.
The kitchen in a Temecula tract house is often open to the family room, so the work zone is bigger than it looks. Furniture near the kitchen opening gets moved or covered, because slabs are carried on edge and a corner can swing wide at a doorway.
What needs to be done before the day?
The list below is the one crews tend to repeat, in roughly the order it matters.
- Cabinets fastened to each other and to the wall, with every door and drawer front free of the top edge
- Old top removed and the cabinet frame checked for level
- Sink and faucet on site, with the mounting hardware in the box
- Cooktop or range on site, so the cutout and the wall clearance match the real model
- Path from the street to the kitchen cleared, including the driveway, the porch and any gate
- Pets and children kept in another room or out of the house for the length of the setting
- Water shut off at the sink if plumbing has been disconnected, and the main valve located
None of these items is hard. The trouble comes when one is skipped and discovered on the day, because a missing sink means the undermount cutout cannot be checked, and a missing range means a clearance question hangs over the cooktop opening.
Who has to be home?
An adult who can make decisions should be home from the start of the crew's work until the final walkthrough. Install day is mostly mechanical, but a few questions come up that only the owner can settle: where a seam falls if the layout needs a small adjustment, whether a chipped edge is acceptable or needs a repair, and where the sink faucet holes go if the tap has a side sprayer. A decision delayed until the owner returns can mean a return visit.
What about the heat?
Temecula afternoons in summer push the working time of seam adhesive down, and a garage that stands open to the sun becomes an oven by early afternoon. Crews start early for that reason, and an early crew means the homeowner is up early too. A cool kitchen helps the work: running the air conditioning the night before and keeping blinds closed on the sunny side of the house keeps the stone and the cabinets from heating before the pieces go in.
Slabs and cut pieces also get shaded. A tarp over the stone on the driveway or a spot in the garage keeps the surface from soaking up heat, and a hot slab set on a cool cabinet can behave differently while the adhesive cures. The crew handles that, but the owner can help by clearing shade space near the door.
Is a lot of dust normal?
Some, yes. Most cutting happens outside, either at the shop or in the driveway, and the pieces come in finished. A last-minute adjustment, such as widening a sink cutout, may be made on site with a grinder and a water feed. The resulting slurry is wiped up on the spot. In the dry months the wind from the Temecula Valley can carry fine grit from the river bed into the open garage, so crews close the door while seams are made and wipe the edges just before the adhesive goes in.
The homeowner can cut the dust further by covering open shelves and closing the doors to rooms the crew will not use. A sheet over the sofa in the next room is cheap protection.
How long does the day take?
A small kitchen with one seam can be set in a morning. A long L-shaped kitchen with an island, a waterfall edge and a cooktop cutout takes most of a working day. The order is usually the same: bring in the longest runs first, set them dry, check the fit against the wall, make the seam with color-matched adhesive and clamps, then set the island, then check the overhang supports and the leveling of every piece.
Backsplash comes last. A thin stone backsplash is bonded with adhesive the same day, and a tiled one waits for a tile setter. Caulk goes into the gap at the wall once everything has been checked.
What happens with the sink and the plumber?
The stone is set before the sink goes in. An undermount sink is clipped and glued under the cutout after the top is bonded, and the plumber reconnects the supply and drain afterward. A drop-in cooktop is lowered into its opening and connected by a licensed person. This is why a kitchen may be without water for part of a day or overnight. Planning a few meals that need no sink is worth the effort.
If the plumber is separate from the stone crew, the two need to agree on timing in advance. A plumber who arrives before the adhesive has cured risks loading the new top before it is ready, and one who arrives too late leaves the kitchen unusable another day.
What does the crew check before leaving?
A walkthrough covers the points a homeowner cannot easily see. The installer runs a hand along each seam, looks along the surface at a low angle for lippage, taps near the sink cutout for hollow spots, and presses on the overhang to confirm it is supported. A straight edge goes across the top to confirm it is level. Chips along the edge are filled with a matching resin on the spot.
The owner gets a short set of care instructions: no hot pans straight from the burner on the new surface, no heavy standing on the overhang, and a day or more before the top carries a heavy load. Sealing, if the stone needs it, is mentioned for materials such as marble, soapstone and some granite. Quartz and porcelain do not need sealing.
Can anything be fixed after the crew leaves?
Small things, yes. A slightly proud seam can be polished down, a thin gap at the wall can be recaulked, and a faucet hole can be reamed larger. A slab that rocks, a cutout that is the wrong size or a crack near the sink is a bigger problem, usually one that traces back to a mistake in the template or a cabinet that moved. For that reason crews like to resolve questions on the spot, while the tools and the pieces are still in the kitchen.
What if the weather turns?
Rain in the Inland Empire is rare but not unknown, and a wet driveway is a hazard for a slab on an A-frame cart. Crews postpone if the surface is slick or if wind makes carrying a large piece unsafe. A day lost to weather is better than a dropped slab, and the template stays valid as long as the cabinets stay put.
What happens right after?
The kitchen is usable the next day for light work, and for heavy use after the adhesive has fully cured. A new top should be treated gently for the first stretch: wiped with a soft cloth, kept clear of strong chemicals and not used as a cutting board. The installer's walkthrough is the last step in the sequence, and a clean, level, supported top with tight seams is the result the earlier steps were aiming at.

Tearing Out Old Countertops Before New Stone Goes In
Why does tear-out come before the template?
Most Temecula kitchens that get new stone already have something else on the cabinets: laminate from the original build, tile that was laid in a later remodel, or an older granite slab that no longer suits the room. The old top has to come off before anyone can see the real condition of the cabinets, and the real condition is what the new template depends on. A tech who measures over an old laminate edge records the wrong height, the wrong wall gap and sometimes the wrong cabinet depth.
For that reason, many crews treat tear-out as its own visit, or as the first hour of a longer one, and the template comes after the cabinets are bare. The sequence matters because a template cut from a measured shape cannot be adjusted once the stone is cut. Everything that surprises a crew should surprise it while the cabinets are open and the slab is still sitting in the yard.
What comes off, and how
Each old surface leaves the cabinet in its own way, and each leaves behind its own mess. The table below sets out what a crew meets in the houses common across the Temecula Valley, from tract homes built in the housing boom to ranch houses on larger lots.
| Old surface | How it comes off | What is left behind |
|---|---|---|
| Post-form laminate | Screws from below, then a flat bar under the edge | Contact cement residue and torn particleboard along the front |
| Ceramic tile on a plywood base | Grout cut, tiles chiseled, then the base lifted | Broken edges, thinset smears and sharp fragments |
| Older granite slab | Silicone cut, bracket screws removed, two or more people lift | Silicone ridges and a clean cabinet frame |
| Solid surface | Seam adhesive cut with a saw blade, glue-down strips released | Adhesive beads along the cabinet rails |
| Butcher block | Screws from below through the cabinet corners | Oil stains and swollen wood near the sink |
The tile case is the slowest and the dustiest. Ceramic tile on a mortar bed or a cement board base breaks into sharp pieces, and the crew has to protect the floor and the cabinet doors before the first strike. Laminate is the fastest, though the particleboard underneath often swells where the sink leaked, and a swollen front rail can throw the new top out of level.
Dust, water and the Inland Empire wind
Tear-out in the Temecula area has a seasonal side. In the dry months a driveway full of broken tile and gritty slurry dries out in an afternoon, and a breeze from the Santa Margarita River bed lifts the fine dust into the garage and onto the street. Crews sweep as they go and keep a hose for the cutting, because dry dust from old cement board is a respiratory irritant and gets into everything in a house that is still lived in.
Cabinet doors and drawer fronts get taped or removed, and anything inside the upper cabinets gets covered, since dust travels upward. Appliances stay in place when they can, but the range often has to slide out so the stone behind it can be removed cleanly. The refrigerator usually stays, though its water line gets checked for kinks while it is accessible.
What the bare cabinets reveal
Once the old top is gone, the cabinets tell their own story. A tract house built quickly may have base cabinets that are fastened to each other but not shimmed to the floor, so one run sits a quarter inch lower than the next. A ranch house that has been remodeled twice may have a mixture of cabinet depths where an addition meets the original kitchen. Neither is a failure, but both change the plan.
The crew looks for these items in a fixed order:
- Level along each run, checked with a long straight edge from one end to the other
- Cabinet depth at the front and back, so the overhang can be planned consistently
- Water damage near the sink base, where a slow leak softens the cabinet floor and the top rails
- Gaps between the cabinets and the wall, which decide how much scribing the new slab edge will need
- Support under any planned overhang, since an island with no corbel or bracket backing needs it added
- Electrical boxes and plumbing stubs that sit where a seam or cutout might fall
Shims go in where the cabinets are low. A swollen rail gets replaced or reinforced. A wall that bows gets noted so the template follows the actual curve. Fixing these now costs minutes. Finding them after the slab is cut costs a remake.
The old sink and the cooktop
An old sink often comes out with its top, particularly a drop-in style that clips down. An undermount sink from a previous granite top is more awkward, because it hangs from the stone on brackets and adhesive and has to be cut loose first. If the homeowner plans to keep the sink, the crew checks the bowl for chips and the rim for flatness, since a new undermount sink cutout is drawn from the actual bowl, and a damaged one gives a poor reveal.
Cooktops and slide-in ranges raise their own questions. A cooktop that is staying has to be lifted out of the old stone and set aside on a blanket, and its clearance sheet kept for the new cutout. A range that is being replaced should be on site before the template, because the cutout and the wall clearance come from the new model, not the old one. Gas lines stay capped until a licensed person reconnects them after the new stone is bonded.
Disposal of the old stone
Old granite is heavy and awkward. A kitchen run may weigh as much as a small car engine, and the pieces cannot be dropped into a regular household bin. Crews that haul away old tops take them on the same truck or a separate trailer, and sometimes a homeowner keeps a piece to reuse as a garage workbench or a garden bench. A remnant of old granite can also make a good cutting board base or a patio table top once it is cleaned.
Laminate and particleboard go to a transfer station. Tile and mortar waste is dense and goes in a dumpster or a heavy-debris load. In Riverside County, loads that mix drywall dust, tile and wood often have to be separated, so crews sort as they work.
Do the stages ever overlap?
Sometimes tear-out and template happen on the same day. A crew arrives, removes the old top, checks the cabinets, and the template tech measures that afternoon. That saves a trip, but it is only safe when the cabinets are in good shape. If the tear-out turns up a bad rail or a bowed wall, the template visit waits until the repair is done.
The reverse order is a mistake. Templating over an old top, then removing it later, means the measurements include the thickness of the old surface and the wall gap hidden under its edge. A template made that way is wrong by a small amount, and a small amount is the difference between a tight seam and a visible one.
Between tear-out and install
The kitchen sits without counters for a stretch while the shop cuts the stone. That gap can feel long in a house where the family still cooks, so planning matters: a small table with a hot plate, a bathroom sink for dishes, and a plan for where the refrigerator contents will live. Plumbing is capped or the sink is set on a temporary board.
During that gap the cabinets must not change. A fresh coat of paint on the face frames is fine, but moving a cabinet or adding trim that sticks above the top edge affects the template. Anything that touches the height or the wall line should be finished before the template or held until after the stone is set.
What stays the same
Whatever the old surface was, the goal of tear-out is a clean, level, fastened cabinet base with every surprise already known. The crew that does it well hands the template tech a kitchen with nothing hidden, and the install crew arrives to find stone that fits the room as it actually is, not as it looked in a photo.